
Transcription of part of the Webinar – Episode #2 held by Lorenzo Di Giacomo, Big Data & Software Engineer
Welcome everyone at the 2nd webinar devoted to the DYDAS digital platform. Today I’m going to show you how to work with models inside the digital platform and how to use it and how to work with data and also, you’re going to see the file manager features.
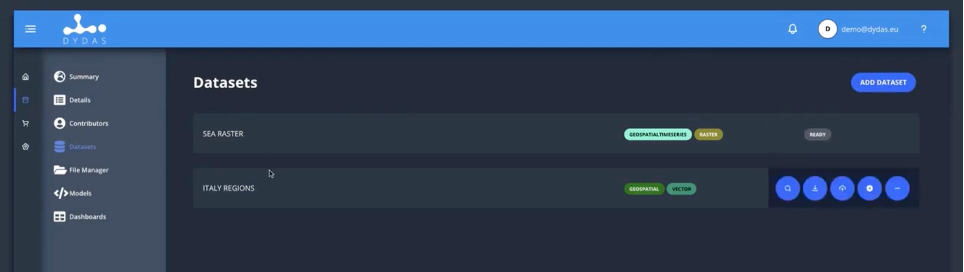
We already saw in the first webinar DYDAS platform and now we are going to workspace section where are allocated all our projects and we can edit/modify them.
We have the two dataset that we already created in the first webinar and now we’re going to work with the models.

What are the models? Well, a model is basically a Sandbox of your own code that would be executed inside the DYDAS platform infrastructure.
Within the “Labs” of the model available in DYDAS digital platform we can create our own model starting from specifying the model’s name and after it will automatically generate an ID and we can add a description and we must choose a license. This is important, as we will see, in the next webinar, when we will talk about the “marketplace section”.
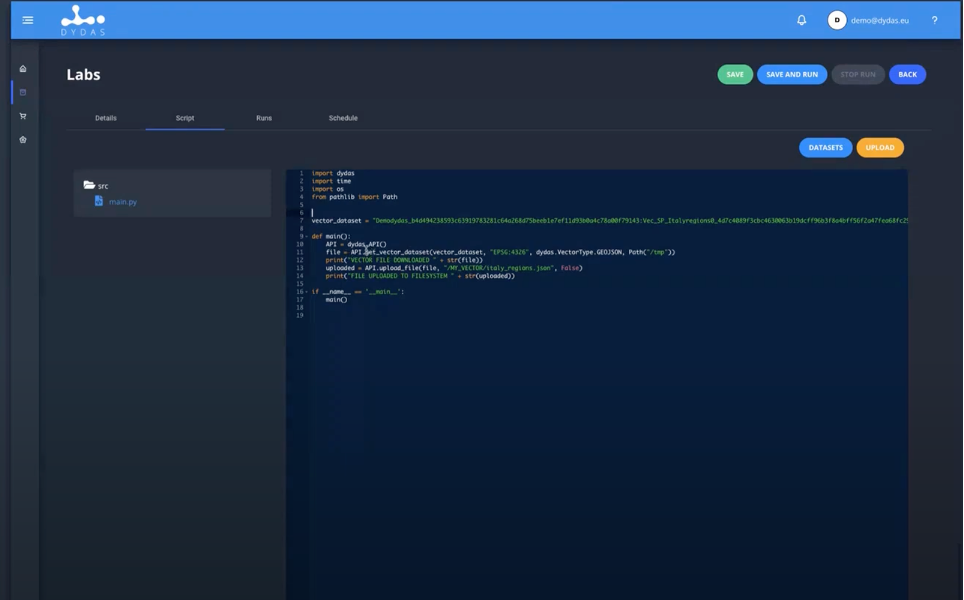
For this simple example I prepared a simple DYDAS script package mad by Python and basically it provides all the API required to talk with the platform meaning to download a vector data set to upload the file inside the project file system of DYDAS.
Through DYDAS package we can have all the features that allow manually via the user interface inside the data’s platform to upload the vector or raster dataset. Also there are the possibility to charge simple dataset that like, for example, CSV files. We can also download the dataset we find inside the “Labs” where the model will executed your own dataset, for example here you download a vector file via the API, and you pass the full name of the dataset like there (see the image above) just uploaded with the possibility to see all the lists of the dataset by clicking on the button “Dataset”, related to the Italian regions.

The entire content is available via the video clip in the YouTube channel
Come utilizzare la piattaforma DYDAS – Episodio #2 Creazione del modello, esecuzione e visualizzazione dei risultati
Webinar tenuto da Lorenzo Di Giacomo, Big Data & Software Engineer.
Benvenuti a tutti al 2° webinar dedicato alla piattaforma digitale DYDAS. Oggi ti mostrerò come lavorare con i modelli all’interno della piattaforma digitale e come usarla e come lavorare con i dati e inoltre, vedrai le funzionalità del file manager.
Abbiamo già visto nel primo webinar sulla piattaforma DYDAS e ora andiamo nella sezione dell’area di lavoro dove sono allocati tutti i nostri progetti e possiamo modificarli/modificarli.
Abbiamo i due set di dati che abbiamo già creato nel primo webinar e ora lavoreremo con i modelli.
Quali sono i modelli? Bene, un modello è fondamentalmente una sandbox del tuo codice che verrebbe eseguito all’interno dell’infrastruttura della piattaforma DYDAS.
All’interno dei “Lab” del modello disponibile nella piattaforma digitale DYDAS possiamo creare il nostro modello partendo dalla specifica del nome del modello e dopo genererà automaticamente un ID e possiamo aggiungere una descrizione e dobbiamo scegliere una licenza. Questo è importante, come vedremo, nel prossimo webinar, quando parleremo della “sezione marketplace”.
Per questo semplice esempio ho preparato un semplice pacchetto di script DYDAS realizzato da Python e fondamentalmente fornisce tutte le API necessarie per dialogare con la piattaforma, ovvero scaricare un set di dati vettoriali per caricare il file all’interno del file system di progetto di DYDAS.
Attraverso il pacchetto DYDAS possiamo avere tutte le funzionalità che consentono manualmente tramite l’interfaccia utente all’interno della piattaforma dati di caricare il dataset vettoriale o raster. Inoltre c’è la possibilità di caricare semplici set di dati come, ad esempio, file CSV. Possiamo anche scaricare il set di dati che troviamo all’interno dei “Labs” dove il modello eseguirà il tuo set di dati, ad esempio qui scarichi un file vettoriale tramite l’API e passi il nome completo del set di dati come lì (vedi l’immagine sopra ) appena caricato con la possibilità di vedere tutti gli elenchi dei dataset cliccando sul pulsante “Dataset”, relativo alle regioni italiane.
L’intero contenuto è disponibile tramite la clip video nel canale YouTube